Friday 30 June 2017

Microsoft OneNote – Clip the web to OneNote using OneNote Clipper

Microsoft OneNote - TIPS & TRICKS TO SAVE YOU TIME – Clip the web to OneNote using OneNote Clipper

OneNote Clipper is a free app that you can get from onenote.com/clipper

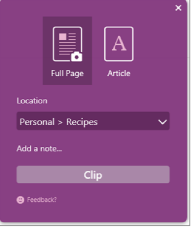
OneNote Clipper allows you to clip the web right to OneNote. When you open Clipper, you can choose to clip an entire page or just part of one. You can even choose what notebook and section to clip it to, so you'll know where to find it later.

Here’s what you do:

Save anything on the web to OneNote in one click:


Clipper sits on your browser's Favourites bar, so it's at your fingertips when you need it.

Microsoft OneNote 2016 - Get Started with the Initial Screen

Microsoft OneNote 2016 - TIPS & TRICKS TO SAVE YOU TIME – Get Started with the Initial Screen

The initial Start screen allow you to easily create a new Notebook, Sections within a Notebook, or even Pages within Sections of a Notebook. Then, simply click anywhere on the page to start typing notes.
Here’s what you do:

Notebook Structure - At the far left (just below the Ribbon), click the drop-down arrow (immediately to the right of the Notebook name) to see all of your Notebooks, create a new Notebook, or pin the Notebook section so that all Notebooks are always visible.
Note: Right-click Notebook name to see options for Sync, Share, Copy, Close, and more.

Section Tabs - To the right of the Notebook name (just below the Ribbon), click the little ‘+’ sign (immediately to the right of a Section tab) to create a new Section within the current Notebook.
Note: Right-click any Section tab to see options for Rename, Export, Delete, Move/Copy, Merge, Group, and more.

Page List - On the right side of the screen (just below the Ribbon), click the little ‘+’ sign (immediately to the left of ‘Add Page’) to create a new page within the current section of the current notebook.
Note: Right-click any page tab in the page list section to see options for rename, delete, move/ copy, and more.

Page Title/ Page Name - To add a page title, click the page header area at the top of the page and type the title. Titles also show up in the page tabs near the right of the page.

Page - To type notes on a page in OneNote, click wherever you want them to appear, and then start typing. Whenever you want to begin a note elsewhere on the page, just click and start typing there. Note: If your computer supports handwriting, on the Draw tab, select a pen, and then draw or write directly on your screen.

Search - From the Search box (above the Page List), you can search just the current Page, a Section or a Notebook.

Microsoft OneNote 2016 – Create Quick Notes

Think of Quick Notes as the electronic equivalent of a little yellow sticky note. Unlike paper though, Quick Notes are instantly saved to your OneNote 2016 notebook so you can search and organize them.

You can create a new Quick Note while OneNote is running:
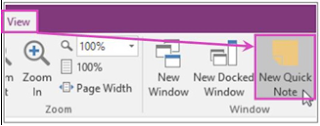
1. Choose the View tab > New Quick Note.

2. Type your note in the small note window. You can format the text by using the commands on the mini toolbar that appears. (If you don't see the toolbar, click the ... at the top of the window.)

3. Repeat the previous steps for any additional Quick Notes that you want to create.


You can move Quick Notes anywhere on your screen and leave them there for as long as you need to refer to them. When you’re done with a Quick Note, close the window.


Note:
Closing a Quick Note window does not delete the note.

Like regular notes, OneNote automatically saves your Quick Notes as soon as you’ve created them and whenever you edit them.

Quick Notes are stored in the Unfiled Notes section in your default notebook.


You can find them quickly by opening your Notebooks list (click the down-arrow next to the name of your notebook and look at the bottom of the list for Quick Notes).

Microsoft OneNote 2016 – Search for Tagged Notes

If you've previously added tags to any of your notes, you can search for the tags by using tag keywords. In OneNote the results appear in an easy-to-read summary.

Create a summary of tagged notes:
Note: Note tags need to be associated with typed or handwritten notes in order for them to appear in your search.

1.     Click the Home tab > Find Tags.


2. In the Tags Summary task pane that opens, click any tag in the list to open the page that contains the associated tagged note.


Note: To narrow the search, at the bottom of the Tags Summary task pane, click the Search drop-down, select a narrower search scope from the list, and then click Refresh Results.

If you want to view the tag search results as a notes page, click the “Create Summary Page” button at the bottom of the Tags Summary task pane.