If the database that is required is similar to a template then whole database can be generated by using a template that already exists.
We will look at three ways of creating a table:
1. A blank table.
2. A table based on a table.
3. A table in design view where you have total control as to how the data is displayed and entered into the table.
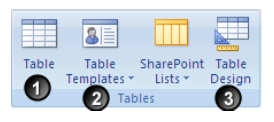
A Blank Table
When a blank database is set up a table is automatically created: Otherwise to create a blank table
1. Click on the Create Tab of the Ribbon.
2. Click on the Table icon.
The table can be amended to contain the data required by:
Clicking on the column headings and changing them as necessary. If you are not happy with the first field name of ID then it can be changed as necessary.
Other field names can be changed by Clicking on the Add New Field column heading. As fields are added that heading just keeps moving along onto the next blank column.
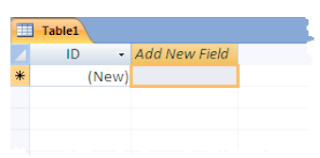
The data can be added underneath the field names and as the data is added the fields will automatically get their data-types set from the information typed into the table.
The ID field is set up to be AutoNumber as default and so cannot be typed into as the number is generated automatically when information is added elsewhere on the record
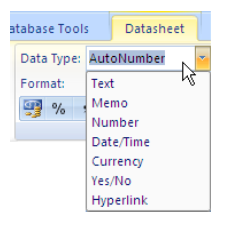
If the data needs to be changed then the Data Type for the field needs to be changed. The data types for any of the fields can also be changed if necessary.
Changing the data type
1. Select the field to be changed.
2. Click on Data Type (on the Datasheet ribbon selected automatically).
3. Select the Data Type required.
When a table has been created in this way when you close it the first time it must be saved, otherwise all the changes and data is lost.
Saving the table
1. Right Click on the table name.
2. Select Save or Close.
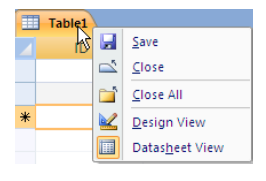
If Close has been chosen you will be asked whether you wish to save – answer yes!
3. Enter name of table
Creating a table based on a template
If the table that you need to create follows a standard pattern, then you do not need to start from scratch and build up the entire table. You can use a template and then use the table as it is or amend it as necessary.
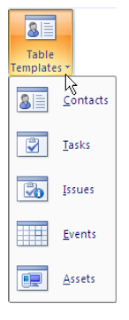
To create a table from a template click on the Table Templates button and then select the template required. This creates a table with the appropriate fields already set up. At this point, more fields can be added or the existing fields amended.
The table will need to be saved otherwise all the data and setup will be lost.
Create a table in design view
When a table is created in design view, you have total control over the table. When you have gone through the design phase of planning the database this is probably how most people set up the database.
Before creating a table in this way not only do you need to know what fields are needed in the table, but also what sort of data they will hold, what rules the data has to follow and how the tables are going to be inter-connected.
Once a table has been set up, whether by design view, blank table or a template, it can then be changed by using the design view of the table. There are factors that have to be taken into consideration when amendments are being made.
The main considerations are:
Data types.
Relationships.
Validation rules.
The way of making the inter-connections between the tables is known as lookups. If Lookups are to be set up then the relationships cannot be set up prior to the lookups.
The purists amongst database designers do not think they should be done at this point of a database development.
To create a table in design view – click on the button on the create ribbon – this brings up the design view.
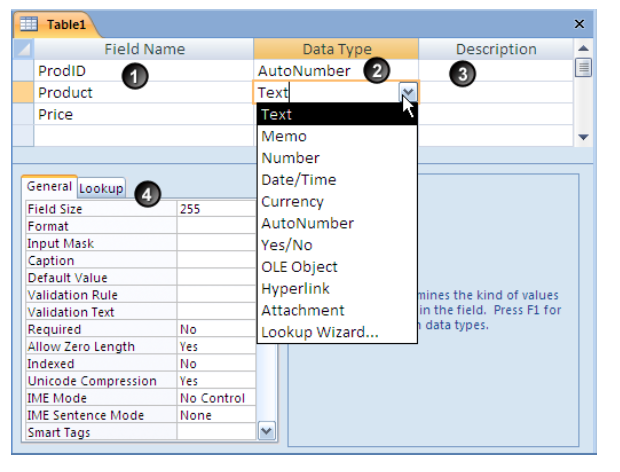
1. List the fields in this column.
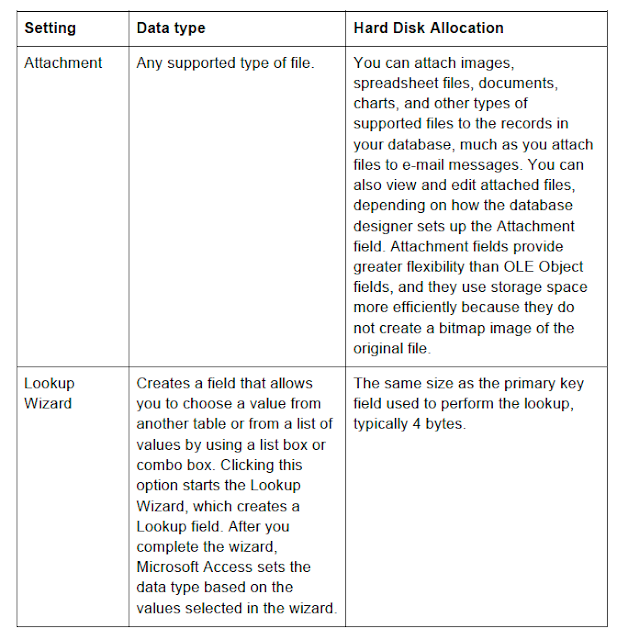
2. Choose the data type for each field.
3. Add a description of the field – this will appear on the status bar whenever the cursor is in this field where data can be entered. (Optional)
4. Set the properties of the selected field.
The field name can be up to 64 characters long. Spaces are allowed (though not advised if you are going to be using the more advanced features of Access.) The field name cannot start with a space and capital letters are allowed.
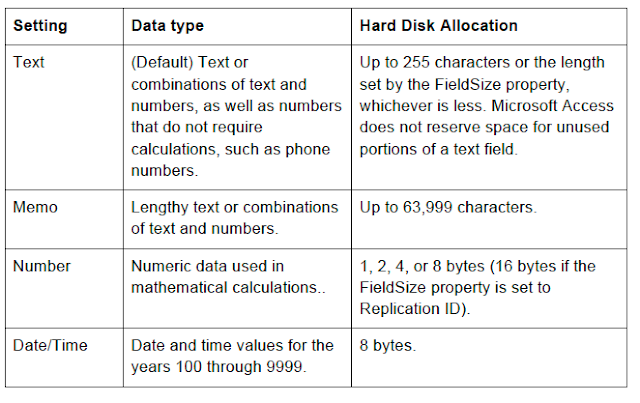
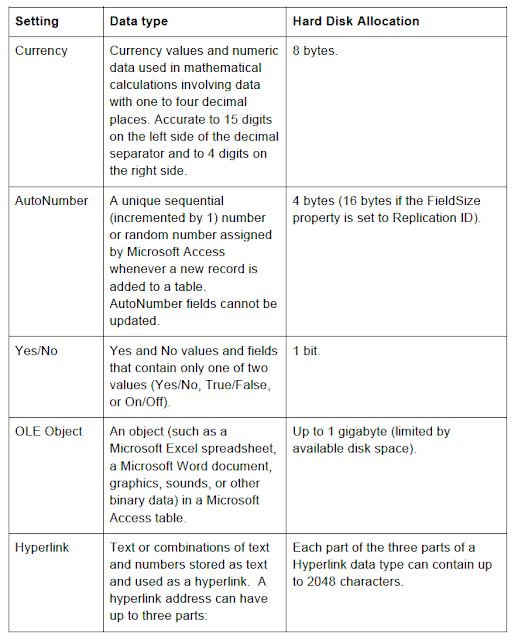
The data type controls what sort of data needs to be typed in. It is not dependent on the field name.
For instance, the field name might be telephone number but the data type needs to be text. When typing in the data there would be a space, it would start with a Zero which numerically has no value and you might even want to put in an extension number.

No comments:
Post a Comment