Create a plan
Microsoft Project has just been started then, if the settings are on the standard settings, a blank document will already be open for you to start creating your plan.
Otherwise
Click on the new icon
Or
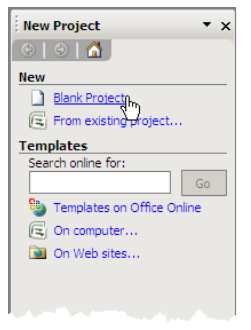
1. Menu, File, New
2. Select Blank Project

Save a plan
It is important to save your work regularly, save as often as the amount of work you are prepared to lose.
To save click on the save button. If this is the first time that the project is being saved it will open the save as dialog box
1. Select the drive and folder where the project file should be saved.
2. Give the project a name.
3. Click on the save button.
Once a project has been saved, then the Save button will automatically save under the name it has been saved under previously.
Project can be set up so that it saves automatically after a specified number of minutes. It can also be set up so that it saves automatically, or it prompts you to save. This is done in by:
Menu, Tools, Options and on the SAVE tab.
Be careful of setting up the automatic save option when the project plan is being developed, as sometimes different design considerations need to be tried out before deciding on which one to go for. If automatic saving has been enabled then the user does not have full control of the save process.


No comments:
Post a Comment