Creating Select Queries
The select query is the default query point. If other types of queries are required they normally start off as a select query.
The different stages of setting up a select query are:
1. Select the fields required in the query.
2. Enter the criteria required on one or more fields.
3. Run the query.
The query can be generated manually in design view or by using the wizard.
Creating a query using the wizard
1. Select Table or Query (in the Navigation Pane) upon which the new query is to be based on.
2. Click on the Query Wizard button on the Create Button.

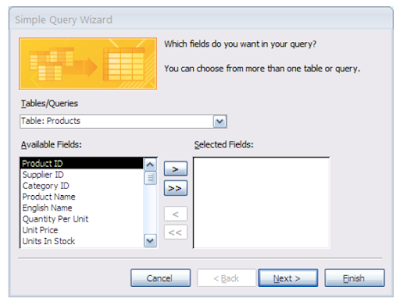
3. Select the Simple Query Wizard.

(Notice that the table selected in step 1 is listed under Table/Queries, if it is the incorrect one then it can be changed at this point).
4. Select the fields required by either double clicking on the necessary fields in the Available Fields column or by clicking on them and then using the single Arrow button to take them across to the Selected Fields column.
If all the fields are necessary then the double arrows will take across all of the fields. If any unnecessary column is taken across, it can be removed by using the arrows point ing to the left.
5. On the next screen select detail (as apposed to summary – which we will look at later).
6. Then give the query a name and decide what you want to view.

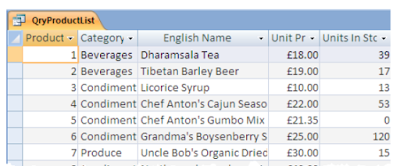
Using the wizard in this way will give you a complete list of records from the table that you selected. It will show you the fields that you selected and display them in the natural order of the table.
The wizard does not allow you to add a criteria or provide a sort order.

No comments:
Post a Comment