
Creating Merged Mailing Labels.
It is possible to use a data document to perfom mailing labels, the process is similar to creating a merge letter.Within the wizzard it is possible to select brand-named labels in specific size.
After you have merged the data into the main document with the labels, you can prin the Lbels onto printer.
1. Click the Mailings tab

2. Click on the Start Mail Merge button.

3. Select the Labels option

4. Specify printer settings →label Vendor → Product number.
5. Click Ok.

6. Click on Select Recipients

7. Select the source for the recipient list

In this example we will be using an Excel file.
8. Select the type of file that contains your recipient list.
9. Locate the folder and file containing the recipient list.
10. Click Open.

11. Select the table containing the recipient list.
12. Click Ok.

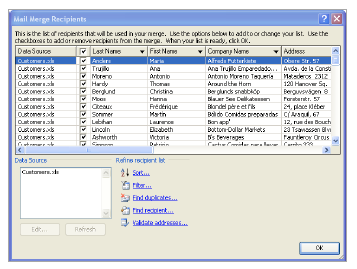
13. Click Edit Recipients List to filter recipients.

14. Select desired recipients.
Once you have completed selecting your recipient list you document should look like the document below. (maybe slightly different depending on label selected).

15. Click in the first label of the document, select one of the field items from the Mailings → Write & Insert Fields → Address Block.
16. Click Update Labels.

17. Click on b.

18. Make any modifications
19. Click on Finish & Merge.

20. Select the require option.
In this example we have selected to Print Documents.

No comments:
Post a Comment