Working With Distribution Lists.
A distribution list is a collection of email addresses that you may email of a regular basis, saving you selecting email address individually.The distribution list can contain email addresses from the corporate address book and Outlook contact folders.
You can create as many distribution list as you wish, but when naming the distribution list make sure you give the group a logical name so that you do not select the wrong one when you choose it when creating an email !!!
To Create a new Distribution List
1. Select the File menu → New → Distribution List.

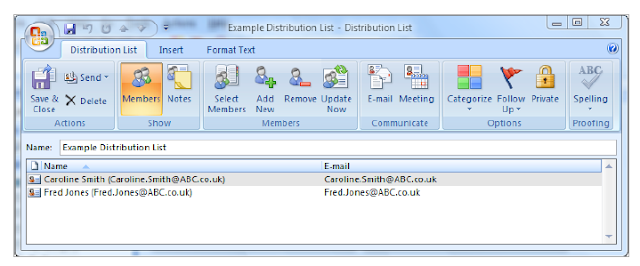
2. Enter a name for the Distribution List.

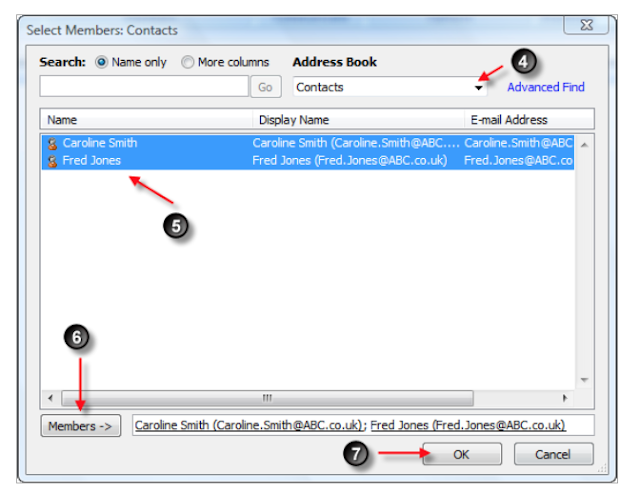
Click on the Select members to display select the available email addresses from Outlook Address books.


4. Select the address book that contains the email addresses that you wish to include in the distribution list.
5. Highlight the contact names.
6. Click on the Members button to add the address to the Distribution List.
7. Click Ok.

8. Click on Save & Close to save the distribution list into your contacts folder.

Addressing an Email using a Distribution List.
From the contacts folder.Select the New Message to contact icon

From the Inbox.
Address the email in the normal way, by default the Distribution List will be stored in the contacts folder.
Once the Distribution List has been selected the name of the distribution list will be displayed in the message To: bar.
To view the addresses details for the group select the plus sign to the left of the Distribution List name.

Modifying the Distribution List.
It is possible to add or remove members from the Distribution List.To add or remove members, open the distribution list by double clicking on the Distribution List that you wish to modify.
Add New Members: Click on the Select the Select Members icon, and select the addition members, save the Distribution List.

Remove Members: Highlight the members that you wish to remove and select the Remove icon, save and close the Distribution List.


No comments:
Post a Comment