Wednesday, 21 August 2013

Excel AutoSum Revisited

You just can't get away from AutoSum. If I had a pound for every time I've clicked AutoSum to add up a column of numbers I would probably be sitting on a tropical island somewhere still clicking it to add up all my vast wealth. It's one of the first things you learn about in Excel and, of course, everybody knows it inside out.

Select the cells
Here's a really easy way of calculating column and row totals without having to do all that infernal copying.

First job is to select all the cells containing your numbers and extend the selection to the empty cells where you want the totals.

Click AutoSum
Then you click AutoSum and you're done! It really is that easy. If you only want the column totals then just select the cells with the numbers and the totals are returned into the row below.
Column and Row totals
Here's all the column and row totals done in two simple steps. And they are done perfectly as the range references in the SUMs are implied by the selection. They hardly need to be checked.


AutoSum shortcut
If you prefer to do the whole thing with your keyboard then hold down the SHIFT key and extend the cell selection by pressing the arrow keys. Then use the shortcut key combination ALT= to generate the SUM formulas.


Grand Totals

But it's not just one table is it, you've got loads of them and some serious number crunching to do. You can extend the select-and-click-AutoSum method to do grand totals as well. But, be careful, this method only really works if every line item in your worksheet is drawn into a subtotal.

The Selection for AutoSum Grand Totals
Firstly, calculate all of your individual subtotals and then make a selection of all of the cells containing your numbers and the cells containing your subtotals.

Now, click AutoSum and all the cells containing your subtotal SUMs are detected and the Grand Total is calculated correctly without any risk of double-counting.

Ranges and Unions

Here's the resulting formulas displayed in the cells and you clearly see the formulas containing the original range references for the subtotal SUMs.

The grand total SUMs are unions, showing each subtotal reference separated by commas.

Checking your Formulas

Show the Formulas
As some of us know from bitter experience it is very embarrassing when a simple mistake in your formulas messes up all your careful calculations. It's always a good policy to check that you've got your formulas right but it's a bit painful to view them in the formula bar. 

Formulas displayed in the cells
Display the formulas directly in the cells by clicking the Show Formulas control. It's in the Formula Auditing group of the Formulas tab. Click once to show the formulas and click again to show the results.

Show Formulas shortcut
If you have an older version of Excel then you have to search in the Tools, Options dialog for this option which is not much fun and I recommend that you use the shortcut key combination CTRL ` (that's usually the key under the ESC key on the top right of your keyboard}

Happy number crunching.

Related Posts

Excel-Calculations without formulas
Excel-Sorting by last name
Excel-Switching columns to rows
Excel-Calculating age from date of birth

Training Courses

If you've still got that "I just don't know what I'm doing" feeling then you might like to arrange an Excel training course for yourself or with some of your colleagues. It's really easy to book one of our courses and they're great value for money. See our website for full details.

Tuesday, 20 August 2013

Word Typing-in Accented Characters

Accented Characters

Hold down the ALT key on the left hand side of the keyboard while you type in the four digit code using the numeric key pad on the right hand side of the keyboard. The character is displayed when you release the ALT key.

Activate the numeric key pad by pressing the NUM LOCK key before typing the code. Do not use the number keys at the top of the keyboard as they do not generate the correct codes. Always remember to enter the full four digit code including the leading zero.


Cedilla and Ligatures


Friday, 16 August 2013

PowerPoint Removing Backgrounds from Pictures

Removing Backgrounds from Pictures

Extracting the main subject from the background of a picture or photograph used to be a marathon task (for me!) involving Photoshop masks and paths or background erasers but with Microsoft PowerPoint 2010 and later you can do it directly in process using the Remove Background control.

Elvis on car
You won't get quite the sophistication or fine control of the Photoshop process but for simple images the edge detection is really good and it only takes a few minutes. 

This is perfect for simple image manipulation, like removing the white background from a company logo.

Here's a photograph of our mascot, Elvis, sitting on the bonnet of a car. He loves doing this while the engine's still warm. But I didn't want him on the car, I wanted him on a slide. PowerPoint will do this in 5 minutes, in real life there's no way that cat's moving. The first job is to insert the photograph onto your slide as you usually do and keep it selected.

Next, find the Remove Background control, it's on the extreme left-hand side of the Picture Tools tab. Give it a click and see what it comes up with.

You usually find that the initial results are quite impressive and after a wee bit of tweaking you've got an excellent extraction.

First go. Not bad!
As you can see with this one most of it's good but part of the car has been retained and Elvis has lost his stripey tail.

There's a bounding box around the captured subject image and all the areas of the photograph that are to be removed are coloured mauve.

Now for the tweaking. We're going to adjust the bounding box to include the tail and then zoom in on the other areas and use the controls on the ribbon to specify which parts we need to keep or remove.

Adjusting the bounding box


I've dragged the left edge of the box to the left and Elvis gets his tail back. Great. I've dragged the bottom edge of the box down and Elvis gets his front paw back but I've gone too far down and included his reflection on the car.

Keep going with the box until you get as close as you can to your desired image. Now it's time to zoom in and deal with all the fine work by using the keep and remove controls on the ribbon.

Zoom in or out of your image either by using the Zoom control at the lower right-hand corner of the PowerPoint window or by holding down the CTRL key as you spin your mouse wheel forward or back.
Controls on the Ribbon


When you use the Mark Areas to Keep and Mark Areas to Remove controls don't bother trying to draw a line around the areas to keep or remove, instead draw a line straight across them and let the edge detection do the work for you.

Using the Remove control
Draw a line with the pencil pointer straight across the offending areas.


Zoomed in for fine work
Here we can see the results, after a few swift strokes most of the car has been removed and if I had more patience then I would have continued going around Elvis and tidying up his fur but I wasn't bothered as it's a fairly low-res photograph and the intended slide image is quite small.

It's time to click the Keep Changes control and let the cat out of the bag.

I've often wondered why that cat is called Elvis.


The Thoughts of Chairman Elvis
And finally, here's the old fella on his slide ready to wow his audience by telling them all about the really important things in any cat's life.

I've changed the background image and I've flipped and rotated Elvis. He won't like that at all.

"Where's my dinner?" "Miaow!!!" I think it's time I left the building. Best of luck with your slides.


Related Posts

Excel-Calculations without formulas
Excel-Sorting by last name
Excel-Switching columns to rows
Excel-Calculating age from date of birth

Training Courses

If you've still got that "I just don't know what I'm doing" feeling then you might like to arrange a PowerPoint training course for yourself or with some of your colleagues. It's really easy to book one of our courses and they're great value for money. See our website for full details.

PowerPoint Text Boxes

Formatting Text in Text Boxes

When you format the text inside a text box your formatting is only applied to the word with the focus and all too often you have to drag across your text to select it and, if you're a bit clumsy, you end up moving the text box.

No need. Just click the outside edge of the text box or, even easier, press the ESC key. Now the entire text box is your current selection and your formatting is applied to all of the text in the text box.

Only click on the text in the text box when you want to format a single word or a particular phrase.


White Space in Text Boxes

You don't want every element of text in your presentation to be a bullet point, sometimes it is more natural to use a series of short paragraphs. But when you press ENTER to start a new paragraph the space between the paragraphs is full height because it's based on the font size you are using. 

Paragraphs with full height spacing
Text usually looks better if you reduce the amount of white space between your paragraphs to around half or two-thirds of the height of the font. Say you're using an 32pt font, then you should consider reducing the space to around 18pt or so.

This is a good one to know for Word as well, instead of banging away with ENTER, ENTER after each paragraph; adjust your paragraph's Space After setting to a suitable amount and then press ENTER once to start a new paragraph. ENTER, ENTER is typewriter formatting.

Anyway, let's stay with PowerPoint. To make the setting you either click the Line Spacing control in the Paragraph group on the Home tab and then look for Line Spacing Options or (far easier) click the launcher at the lower right corner of the Paragraph group.

Dialog launcher on the Paragraph group
Take a quick look at the font size you are using and then enter a suitable value into the After box of the Spacing section. This needs a quick bit of mental arithmetic but it's only working out halves or two-thirds and there's no need to be precise.

The space between your paragraphs is now huge because you have your new space after plus the original full height paragraph. Just click after the first paragraph and press DELETE to remove the empty paragraph and leave you with your beautiful, balanced paragraph spacing. 

Paragraphs with balanced spacing
Space After
Space After values can be either typed in or you can use the spinner control.

The effect of the reduced spacing is subtle but it looks so much better than before and that's the type of thing that makes a big difference when your slide is projected on the big screen.

White Space around Bullets

You can also use paragraph formatting to adjust the amount of white space around any bullet points on your slide. This is done using the Indentation settings available when you click the Dialog box launcher at the lower right corner of the Paragraph group.

Paragraph Indentation for Bullet Points
The Before text value sets the amount of white space between the left edge of the text box and the bullet. The Hanging value is the space between the bullet and the text.

Standard bullets with tight spacing
Bullets with looser spacing

Related Posts

PowerPoint-Removing Backgrounds from Pictures

Training Courses

If you've still got that "I just don't know what I'm doing" feeling then you might like to arrange a PowerPoint training course for yourself or with some of your colleagues. It's really easy to book one of our courses and they're great value for money. See our website for full details.

Wednesday, 17 July 2013

Microsoft Windows 8.1 Preview

Windows 8 Background

Windows 8 was released in August 2012 as a radical redesign of the previous Microsoft Windows desktop. It featured an attempt to design an operating system which would be suitable both for the traditional keyboard and mouse set-up and for the more contemporary touch screen (or tablet) devices, such as Microsoft Surface.

The applications created specifically for Windows 8 were implemented using a visual design language called Metro which has subsequently been renamed as Modern. Metro/Modern emphasises the use of very clean, clear typography.

The original design proved to be rather too radical an update for many long-time Windows users, some of whom struggled to perform basic tasks such as starting up an application or finding a recently used file. Windows 8.1 is the update that aims to make the transition from Windows 7 less drastic.

A Taste of Windows 8

My first experience of Windows 8 was typical. I went to visit a customer to deliver an Excel training course. Their IT guy took me under his wing and showed me his beautiful, brand new desktop computers kitted out with touch screens and loaded up with the latest version of Windows.

Hardly able to contain my excitement, I said "Let's start up Excel". A simple task you would think and after a good 10 minutes we had managed to get one machine running Excel. After 20 minutes we had all six going. Of course, this usually takes about 2 minutes.

At the end of the day, my IT guy reappeared and we decided the shut down all of the computers. This proved a little harder than we expected. In fact, we failed. So, being practical guys, we pulled out the power leads. Our excuse was that neither of us had encountered Windows 8 before. I was fascinated to see what Microsoft had made of Windows 8 since.

This review is based on the preview version; there may be significant changes before Windows 8.1 is released later in the year. I mainly used Windows 8.1 with a standard keyboard and mouse laptop but spent a few happy hours with a Lenovo ThinkPad to check out how it behaved with a touch screen.

Start Screen

Once you've signed in you come to the Start screen. This is the famous "dashboard for your world" and you can click any of the tiles to launch a Modern App. If you just want to get some work done then click the Desktop tile (at the lower left hand side) and use the Start button. If you're used to using Windows 8 the small swipe used to select a tile has changed. That now swipes you down to the Apps screen instead. To select a tile, press and hold on it.

Start Screen, the Desktop tile is lower left
The Start screen can be viewed as a replacement for the old Start menu. You can easily create a shortcut for a desktop application and it will launch on the desktop.

Any of the existing tiles can be removed or replaced and you can "pin" any tiles on your Start screen. But if you want to launch an application without creating a shortcut then you go to your Apps screen. On Windows 8 you had to swipe across to see your Apps but now you swipe down.


Display Apps
To go to your Apps screen using your mouse click the downward pointing arrow which is available at the lower left hand side of the screen below the tiles. It becomes visible when you hover your mouse in that area of the screen.


The Apps Screen
The view of the Apps screen shows the Modern Apps listed first and you either swipe or scroll across to see your Office Apps.

You can change this order to show the Office Apps first but whilst a swipe on a small screen is a minor matter it is a painful process with a mouse on a large monitor.

Firstly, you have to point down to the bottom of the screen, find a scroll bar which only becomes active when you hover over with your mouse and then scroll.

Scroll across for Office Apps

Windows 8.1 has a pretty face; it is graphically very attractive but the gloss is starting to come off the product, this is the first of several instances where you feel that this interface was not designed for traditional mouse users.

Of course, what you should do is change the sort order of your Apps. By default they are listed "by name", you just change the order to "by most used" and then you will probably not need to create any shortcuts.


Arranging Windows on the Desktop

One of the major criticisms of Windows 8 was that it was difficult to arrange the different application windows and that you could only have two apps visible at the same time. Relax, this only ever applied to Modern apps on the Start screen, not for apps on the desktop.

Many people need to copy and paste from one window to another and this was never a problem with Windows 8 nor is it an issue with Windows 8.1. Standard apps run on the desktop and you can arrange them as you always have without difficulty. After all, it is called "Windows".

The familiar Desktop

Start Button
The Windows 8.1 desktop is as familiar and as easy to use as any earlier version of Windows.

The original Windows 8 dispensed with the Start button which confused many people as they found that while it was easy to start one application it was not so obvious how to do another. The Start button has now been restored. The original Start menu has not, click the Start button and you go to the Apps screen.

Standard application windows on the Desktop

In Windows 8 it was possible to have two Modern apps on screen at once but one of them had to occupy a thin strip at the side.

This has been changed and you can now have two apps with half of the screen each and you can drag the divider line between them to give one app more space if required.

Depending on the resolution and size of your screen, you may be able to have up to four modern apps next to each other.

Search

Search is much improved. The Windows 8 the system-wide search defaulted to searching for Apps only and threw you out onto the Start screen. You had to click on other categories such as Files or Settings if you were not actually searching for an app.

Search-just start typing!
Search now searches everywhere, including the internet. The Search pane is displayed on top of what you're currently doing.

Clicking any of the returned results will launch the relevant Modern UI app, desktop app or web browser.

But far and away the best bit about Search in Windows 8.1 is the bit you can't see. Search is so easy it hurts. You don't actually have to use any particular control in the interface to search.

You just type something in! Yes, look at the screen, type your search text, the Search pane opens and your search results will instantly be displayed. Brilliant!

We discovered this quite by chance when we were having a Windows 8 moment. Where was File Manager and Control Panel? We typed in "Control Panel" and soon found out. However, it must be said that at the time we had yet to discover our Charms.

Charms

Point your mouse to the relevant hot spots on the screen, that's the top or bottom right hand corners and your "Charms bar" will appear. But don't admire your Charms for too long because they will soon disappear unless you point your mouse towards them to make them active.

The Charms bar-over to the right
The Charms bar includes Search, Share-options for sharing what's currently on your screen, like a web page that you want to email, a Start Button, Devices-devices currently connected such as a printer or a phone and Settings for the majority of options previously available in Control Panel.

The expanded Change PC Settings in Settings gives the complex mass of Control Panel options a nice, clean, straightforward user interface that Windows has needed for years.

Another hidden gem in Settings is the Power icon. One of the most common user complaints about Windows 8 was that while it was fairly obvious how to get to the Start screen and reasonably obvious how to start an application hardly anybody could work out how to turn their system off.

That's how you shut down!
"How do you turn it off?" was the refrain. There are several ways of shutting down, none of them obvious but the easiest, if you know about your Charms, is to go to Settings and click the Power icon then choose Shut Down from the pop-up menu.

It's quite a good idea to learn your Windows shortcut keys if you are going to use Windows 8.1 without a touch screen.

You need your Windows key to switch between the desktop, where you do most of your work, and the Start screen and Apps screen. For example, to get to your File Explorer it's Windows key and you should see "File Explorer" listed on the Apps screen.

The other essentials are:

Charms bar is Windows key + C,
Settings is Windows key + I,
Lock Screen is Windows key + L.

See a comprehensive list of Windows 8 shortcut keys.


Lock Screen

If you sign out or take a coffee break you will return to your Lock screen and have to sign in again with your password. Pretty standard stuff and just what you want. 

The Lock Screen
The Lock screen can be set to turn into a photo gallery, picking photos automatically. So, it's maybe not a good idea to have inappropriate photos tucked away in a folder somewhere.

For tablet computers, you can unlock the camera or answer a Skype call without needing to fiddle with a password.

And it's goodbye to the good old fashioned three finger salute, CTRL+ALT+DEL. It's still supported but no longer needed. To go to the Lock screen deliberately it's Windows key + L.

Should you press CTRL+ALT+DEL out of habit then you need an extra click to choose Lock.

To get past the Lock screen, you swipe up, click your mouse or press a key on the keyboard. Our cat, Elvis showed us how to do this. Every time he sees a shiny screen or a glass window he swipes it with his front paws.

Customisation

If you are using Windows 8.1 on a non-touch system and predominantly use the desktop then a few changes will make a world of difference. There is a new tab, "Navigation", available when you right-click the desktop Taskbar and choose Properties. Here are the options which resolve most of the worse complaints which bedevilled Windows 8.

Three simple changes should make your day:
  1. Start up straight to the desktop and bypass the Start screen.
  2. Show desktop apps before Modern UI apps on the Apps list when sorted by category.
  3. Force the Start screen to show on your main display if you have more than one monitor.

The Case For

  1. Windows 8.1 is not the great leap as Windows 7 to Windows 8 was.
  2. Using Windows 8.1 on a traditional desktop PC only requires a few hours familiarisation, a few tweaks and a bit of patience. And away you go.
  3. Windows 8.1 is a fast, stable OS and that is for the pre-release version.
  4. It's pretty, you do have to look at it all day long.

The Case Against

  1. Windows 8.1 is still an operating system of two halves. If it is to take over the mantle of Windows 7 then it needs to cater to the target market, which is people using Windows at work on a laptop or PC without a touchscreen and using the desktop for the majority of the time. This is likely to be the case for the foreseeable future
  2. These people are working and need to be productive, they probably do not want to jump around between a desktop and a glorified smart phone interface nor do they want to fiddle with settings.
  3. All too often Windows 8.1 breaks the cardinal rule of good user interface design, Don't make me think. Until you are familiar with the new interface some simple tasks will seem to be overly complicated.

The Verdict

Windows 8.1 is good for touch devices but not so much for the traditional mouse, screen and keyboard set-up. It can not be described as unusable as some commentators claim, you can work around its foibles easily.

In the software training business we have seen the take-up of Windows User courses go down every year as nobody needs to be trained in the art of the obvious; new Windows 8.1 users may need a little familiarisation.

The comparison with other, more mature, products is inevitable. Apple iPhone and iPad are universally popular touch devices and with good reason; both work superbly well running iOS. Apple iMac does very well on OSX and you do not put down your iPad, turn to your Mac and starting prodding and pinching the screen. You adapt easily to the different standards.

Touch is useless for a large monitor; large touch screens are physically difficult to use as you have to sit closer and you end up with squinty eyes and tired arms. And God help nature's keyboard pounders using an on-screen keyboard; they'll end up whacking themselves in the nose. Attempting to blend together a tablet user interface with a desktop interface seems to be an unnecessary contrivance. Surely, touch for the big screen is merely a change of input device, maybe Magic Mouse or Trackpad!

So, is Windows 8.1 a triumph or a turkey? It's neither; it's not a turkey as it is quite usable once you get used to it and a significant improvement on the original Windows 8. Nor is it a triumph, more of a work in progress. A bold attempt to integrate touch with the traditional user interface that's maybe not quite as slick as you would like it to be.

List of Windows 8 shortcut keys.

Tuesday, 16 July 2013

Windows 8 Shortcut Keys

You'll definitely be needing your Windows key:

Windows 8 Shortcut Keys


Shortcut Key

Action

Windows + D

Show Desktop

Windows + C

Open Charms Menu

Windows + F

Charms Menu - Search

Windows + H

Charms Menu - Share

Windows + K

Charms Menu - Devices

Windows + I

Charms Menu - Settings

Windows + Q

Search for installed Apps

Windows + W

Search Settings

Windows + Tab

Cycle through Modern Apps

Windows + Shift + Tab

Cycle through in reverse

Windows + .

Snaps an App to the right

Windows + Shift + .

Snaps an App to the left

Windows + ,

Temporarily View Desktop

Alt + F4

Quit Modern Apps

Ctrl + F4

Quit normal Apps

Windows + E

Launch Windows Explorer Window

Windows + L

Lock PC, show Lock screen

Windows + T

Cycle through icons task bar on task bar

Windows + X

Show Advanced Settings Menu

Windows + Page Down

Move Start Screen to right monitor

Windows + Page Up

Move Start Screen to left monitor

Windows + M

Minimise All Windows

Windows + Shift + M

Restore All Windows

Windows + R

Open the Run dialog

Windows + Up Arrow

Maximise the current Window

Windows + Down Arrow

Minimise the current Window

Windows + Left Arrow

Maximise current Window to left

Windows + Right Arrow

Maximise current Window to right

Ctrl + Shift + Escape

Open the Task Manager

Windows + Print Screen

Print Screen and saves to Pictures folder

Windows + Pause Break

Display System Properties

Shift + Delete

Delete a file permanently

Windows + F1

Open Windows Help

Windows + V

Cycle through notifications

Windows + Shift + V

Cycle in reverse 

Windows + 0 to 9

Start App pinned at that position

Windows + Shift + 0 to 9

New instance of pinned App

Alt + Enter

Display Properties of current selection

Alt + Up Arrow

View parent folder 

Alt + Right Arrow

View Next folder 

Alt + Left Arrow

View Previous folder 

Windows + P

Choose secondary display modes

Windows + U

Open Ease of Access Center

Alt + Print Screen

Print Screen of Window with the focus

Windows + Spacebar

Switch input language

Windows + Shift + Spacebar

Switch back to previous language

Windows + Enter

Open Narrator

Windows + +

Zoom In using the Magnifier

Windows + -

Zoom Out using the Magnifier

Windows + Escape

Exit the Magnifier


Monday, 10 June 2013

Star Trek Into Darkness

This starts with a groan-making scene of a couple of space guys running through a planet full of red weeds chased by hordes of teddy bear men but don't let that put you off, the rest of "Star Trek Into Darkness" is pretty good stuff. An exciting and dynamic action movie which can be enjoyed by normal people and not just the trekkie fan boys.

The USS Enterprise
A few too many scintillating action sequences though; there's a limit to how exciting watching your heroes running-really-fast can be and all the explosions, explosions already.

This is a common problem with special effects action movies; you can't hear the actors deliver their lines through all the racket and take away the special effects, what are you left with? Is there any story?

Fortunately in "Star Trek Into Darkness" there's plenty going on; Captain Kirk and Spock continue their bromance, Spock and Uhura show a side to their relationship that we havn't seen before, Leonard Nimoy makes another nostalgic guest appearance and the arch villain Khan (Booooo!!!) returns for another punt at inter-galactic world domination. It's a continuation of one of the greatest space operas with all of our favourite characters.

Star Trek Benedict Cumberbatch
Benedict Cumberbatch plays the baddie
The new face is Benedict Cumberbatch playing a renegade Star Fleet commander. But is he really who he seems? Maybe there's more to it than that? This plot twists and turns like a Cetian eel.

Benedict does the tradition of dastardly, sneering Hollywood British villains proud. Alan Rickman would be delighted to see his performance. This is a sinister, brooding baddie with a serious attitude problem. Why is he so angry? 

Don't call me Ishmael, I am not going to spoil the story for you. This is one to go and see. Klingons on the starboard bow...

And for Albert King fans, watch out for the background music in the bar when Captain Kirk is drowning his sorrows after being sacked? That's right, "Everybody Wants to Go to Heaven (but nobody wants to die)" off Albert's 1971 album "Lovejoy".

Making Sense of Star Trek

I usually enjoy Star Trek movies but there always comes a time when I feel completely baffled. Like I have fallen asleep for a bit and missed something. It's always the same; a wave of excitement runs through the audience, Spock does something vaguely odd and all the trekkie fan boys beam and cast knowing glances at each other. Once, on holiday in San Francisco, I was shocked as the audience actually stood up and cheered. What's going on?

How many Spocks are there? Why is he phoning himself? What is Khan up to, why is he drifting through eternity with a crew of frozen peas? Trying to get some sense out of the trekkies is like communing with mad men; "Right, so there's been a split in the timeline and Spock is Jesus?", "No, no, no", "You're saying that Spock's mother is a whale?". "No, you idiot! Listen to me!"

Apparently you can't understand the new Star Trek stories unless you watch the old ones. I decided that it was time to get the low down on Star Trek and discover all I needed to know about Khan and the Genesis Device. I sat through the 1980's pot boiler, "The Wrath of Khan".

Wrath of Khan
I was caught in a trekkie trap. Yes, you will learn all you ever wanted to know about the voyage of the USS Reliant and the SS Botany Bay but you can't watch this unless you are already a hard-core Star Trek fan. It may very well give you a deep and meaningful insight to the storyline of "Into Darkness" but you will do yourself a serious mischief laughing at it or suffer a nasty attack of déjà vu.

Kajagoogoo in Deep Space
Kajagoo-who, the crew of USS Reliant
The renegade crew of the USS Reliant. Any starship crew that looks so much like the 1980's pop band Kajagoogoo can't be taken seriously and as for having a space ship called Reliant, that is a real no-no.

No one can object to Kajagoogoo but I'd rather not see them in deep space. The lead singer, Limahl was such a mild and gentle soul that the very idea that he can be some kind of intergalactic   super-villain is ludicrous. Imagine being threatened by Limahl: "I'll blast you with my photon torpedoes!". "No, Limahl, don't. I've got a headache", "Oh, alright then".

Reliant, like Enterprise, is a fine nautical name for a space ship but to anyone who lives in the United Kingdom the Reliant can only ever be the Robin Reliant, a quirky three-wheeled motor car with a glass fibre body. The Reliant is very cheap to run and insure and has special place in British popular culture as the butt of all motor car jokes. Not very cool for a space ship.

Claudio Caniggia in Star Trek
Claudio Caniggia?
The helmsman from the Reliant is a dead ringer for Claudio Caniggia, the Argentina International who did so well in the 1990 Italia World Cup. This one comes to a sticky end and is zapped by the boys from the Enterprise but I am glad to say that the real Claudio is still going strong.

For me, the biggest laugh was saved for the costumes of the USS Enterprise crew. They look so outstandingly silly, I know that this was a low-budget production but our heroes are here decked out in a sort of 19th century comic opera, ruritanian military uniform.

In the original TV series the crew wore a practical and workmanlike rig of boots, joggers and t-shirts which looked entirely believable. I know it's science fiction but to enjoy it you have to attempt to believe in it and to see the ship's company looking like they have enlisted in the Red Lancers, one of Napoleon's elite cavalry regiments, spoiled it for me. This is pure Flash Gordon.
Captain Kirk joins the cavalry
Capt. Kirk joins the Red Lancers

Far from exploring strange new worlds and seeking out new life and civilisations the Red Lancers boldly went and invaded Russia in 1812 with the rest of the Grand Army. Riding horses.

Thankfully, in the "Into Darkness" production the Star Fleet uniforms are very tasteful and spiffy in a late 1990's Emporio Armani style. I've never seen a real Star Fleet officer in my life but I thought they looked the part.

Maybe I just wasn't entering into the spirit of the thing. And the next time Spock does something I don't understand, I'll let him get on with it. After all, he is Vulcan.

Monday, 13 May 2013

Alfie Boe and Les Miserables

I was in big trouble with The Boss over my ignorance of the phenomenon known as Alfie Boe and as for not being a Les Mis fan, it was the seventh circle under the pit for me. I knew that some serious crawling was needed. No problem, I've been crawling all my life.

Les Miserables
How's about this for the Les Mis fan? The Les Misérables book! From Stage to Screen is packed with interviews and photographs of the cast and crew of the film, set designs and photographs, memorabilia posters, pictures of the original stage and costume designs and loads of other fascinating trivia. A chocolate box of fun for the serious Les Mis fan.

And all available for a knock-down price at CostCo. I carefully peeled off the price sticker (the old trick) and pressed it into his hot little hands. Job done, all was well with the world.
Les Miserables
But my troubles were not yet over. I had been welcomed to the Boe fold but gently chided by some of our correspondents. Fancy not knowing about Alfie Boe and Les Mis, the poor boy needs to be enlightened.

One of them had very kindly suggested that a suitable course of treatment would be for me to get a copy of the DVD of the 25th Anniversary Concert of Les Miserables performed at the O2 Arena, purchase a nice bottle of wine, invite some friends over, crank up the volume and discover what I've been missing out on.

Now, I know that it was meant kindly but where I come from we call this being "stitched-up". Stitched-up like a kipper. Thanks.

Les Miserables, the treatment 

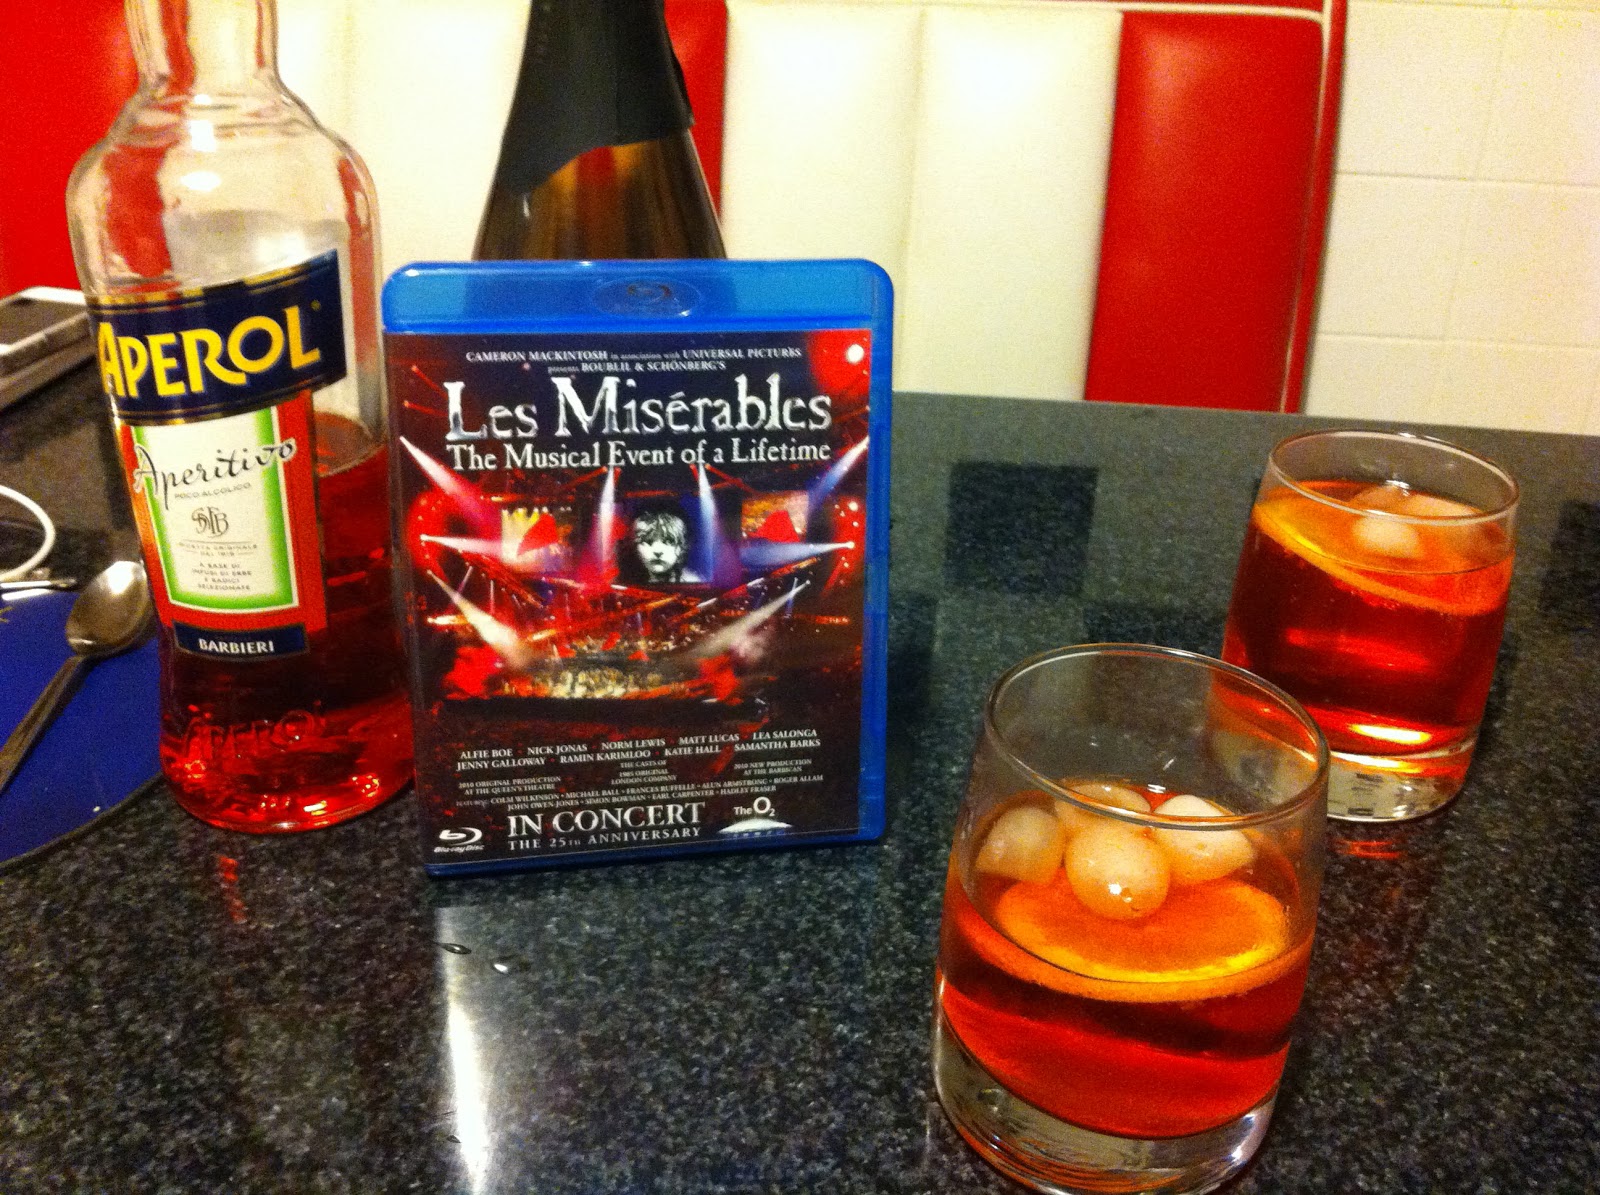
It must be done, there's no getting away from it. I was ready to be treated, processed and re-educated and here's all the good news; Les Mis on the disk and for drinks we are having a recent discovery of mine, Aperol Spritz.

Les Miserables DVD
This is an irresistible mixture of Aperol aperitivo, Prosecco and soda. Such a wonderful colour. The concoction is completed with ice and a slice of orange.

As an incentive to my finishing the treatment I was threatened with something far, far more dreadful than a few hours of Les Mis. Should I fail to pay attention or display insufficient enthusiasm then there was a very special treat in store for me. Yes, an evening with Michael Ball's Christmas songs instead.

By now you may well be thinking, "what's the matter with that?" Michael Ball is an most agreeable troubadour and is much admired. All I can say is Les Mis is utterly fantastic; the very, very best ever and I thoroughly enjoyed every wonderful minute of it. How long to I have to gush for until you put that Michael Ball CD away and stop threatening me with it? I've nothing against Michael Ball as such, after all he's married to Cathy McGowan of Ready Steady Go! fame. It's just that I don't like Christmas songs out of season.

Michael Ball CD
Seriously though, I did enjoy the show, the Matt Lucas performance of Thénardier was particularly good. I'd like to thank you all for bringing a little bit of pleasure to my miserable existence.

But there is a bit of an issue that we need some advice on. As you know, there is an appearance by the "Valjean Quartet" at the end; Alfie Boe, Colm Wilkinson, John Owen-Jones and Simon Bowman. We were wondering how the hard core Alfie fans rated him alongside the other tenors.

In our opinion, Simon Bowman got the thumbs down. Not that he was bad but that the others were so good. Alfie, we thought, was very good but his delivery is so powerful that it could be overwhelming. He is a bit over the top. The Boss rates the mellow tones of Colm Wilkinson and, as it well known that Welshmen are the best singers in the world, my vote went for John Owen-Jones. My family are Welsh but, as it is well known that Welshmen are very fair-minded, I can assure you that this has not influenced my judgement.

Alfie Boe on TV
Anyway, I can now present the case for the defence and offer some pretty solid documentary evidence that I am watching and thoroughly enjoying "Les Misérables". Just in case you can't tell who's who, Alfie is the good looking guy on the telly and I'm the lazy slob with his feet up wearing the Wabis.

To finish, here's an incredibly dull Les Mis story. Some years ago I used to work in Manette Street, which is just up the road from the Palace Theatre in London's West End.

Occasionally, I liked to go for a quiet lunchtime drink at the downstairs bar in the theatre as all the local pubs were packed out with noisy students from Central St Martin's. One day I was chatting with the barman and he said that they'd be closed next week for redecoration as there was a new musical opening. "Oh, what is it?" says I. "Some French thing about Victor Hugo" says he. We both shook our heads and agreed, "Can't see that running for very long...."